
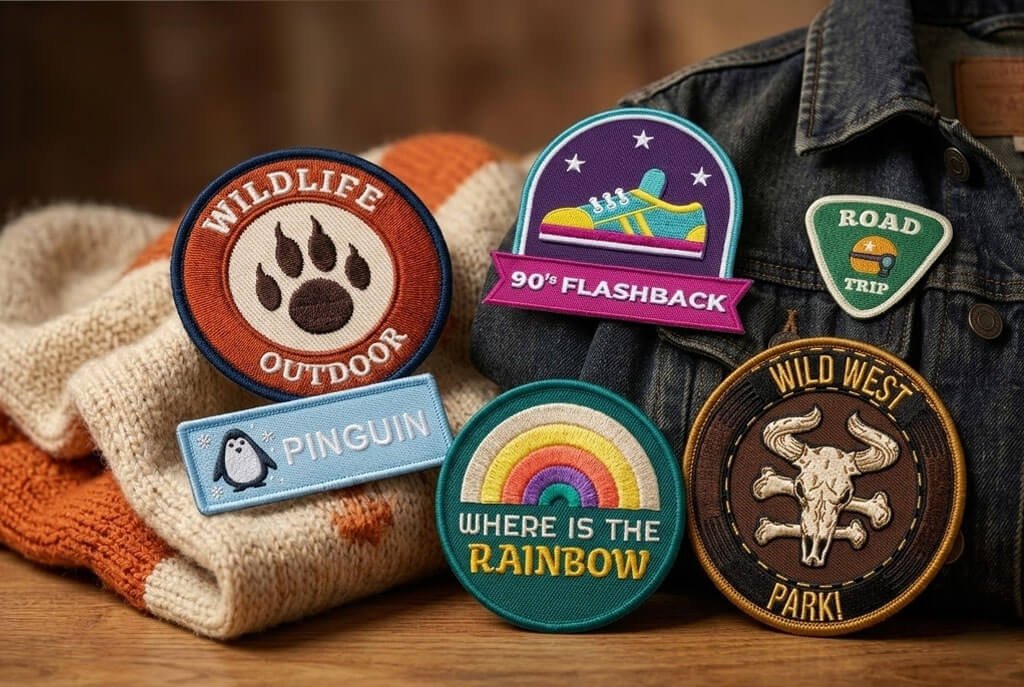
A sports club badge may look simple on a screen, but producing the same design cleanly in thread can be surprisingly difficult. Small lettering, narrow borders, detailed crests and multiple colours can all create problems during machine embroidery. This is where good embroidery digitizing services make a real difference. Proper digitizing tells the embroidery machine how to stitch each part of the badge, which stitch type to use, how dense the stitching should be, and in what order each section should be completed. When the file is prepared correctly, clubs get sharper logos, cleaner lettering and more consistent patches across kits, jackets, caps and other merchandise.
What Embroidery Digitizing Actually Does
Embroidery digitizing is the process of converting a logo, crest or artwork into a stitch file that an embroidery machine can understand.
A standard image such as a JPG, PNG, PDF or vector file contains visual information, but it does not tell an embroidery machine how to recreate the design using thread. A digitized embroidery file contains instructions for stitch placement, stitch direction, colour changes and sequencing.
The process normally involves setting:
- stitch types
- stitch density
- underlay stitching
- pull compensation
- thread direction
- colour sequence
- trims and jump stitches
These settings influence how the finished badge looks on the garment.
For example, a football club crest with small lettering, a shield and a thick outer border may require satin stitches for the text, fill stitches for larger areas and running stitches for fine details.
The digitizing file controls how all these elements work together.
Common Badge and Patch Problems Sports Clubs Experience
Sports clubs often notice embroidery problems after a logo has already been stitched onto shirts, jackets or patches. In many cases, the machine itself is not the main issue. The problem starts with the digitized file.
Small Text Becomes Difficult to Read
Club names, founding dates and short slogans are often included inside crests.
If the lettering is too small or the stitch density is too high, thread can fill the spaces between letters. Characters such as A, R, B and P can become difficult to recognise.
Good digitizing adjusts letter spacing, stitch length and column width so the text remains readable after stitching.
Borders Look Uneven
Many sports badges use a strong outer border around a shield, circle or patch shape.
Poor sequencing can cause the border to shift away from the main design. This creates visible gaps or overlapping stitches.
Correct registration and stitch order help the border align properly with the rest of the badge.
Logos Become Distorted
Embroidery naturally pulls fabric while stitches are being formed.
Without proper pull compensation and underlay, circles can become oval, straight lines can bend and shield shapes can appear uneven.
The digitizer must account for this movement before the machine begins stitching.
Fine Details Disappear
A club crest may contain animals, stars, crowns, dates, banners or very thin lines.
Artwork that looks detailed on a computer screen may not translate directly into embroidery.
Some details need to be simplified carefully so they remain recognisable in thread without changing the identity of the club.
How Better Digitizing Improves Club Badges
Better digitizing improves both the appearance and performance of embroidered sports badges.
Cleaner Lettering and Numbers
Lettering needs enough space between individual stitches to remain readable.
A good embroidery file considers:
- minimum letter height
- satin stitch width
- spacing between characters
- stitch direction
- surrounding stitch density
These adjustments are especially important for small club names and dates.
Sharper Borders and Outlines
Borders are one of the first things people notice on an embroidered patch.
A well-planned file controls the order in which the inner design and outer border are stitched. This reduces registration problems and creates a cleaner edge.
For sew-on patches, the border also helps hold the design together and improves the overall finish.
More Accurate Shapes
Pull compensation slightly extends certain areas of the design to account for fabric movement during stitching.
For example, if embroidery naturally pulls a circle inward, the digitized shape may need to be adjusted so the final stitched result still appears round.
Underlay stitches also stabilise the fabric before the main stitches are applied.
Together, these techniques help shields, circles and geometric shapes retain their intended proportions.
Smoother Colour Changes
Sports club badges often contain several thread colours.
Planning the colour sequence properly reduces unnecessary trims, jump stitches and machine movement.
A cleaner sequence can also reduce production time when hundreds of shirts or patches are being embroidered.
Digitizing Should Match the Fabric and Garment
One of the biggest mistakes in sports embroidery is using exactly the same digitized file on every type of garment.
Different materials behave differently under the needle.
A lightweight football shirt may stretch or pucker more easily than a thick hoodie. A structured cap behaves differently from a flat polo shirt. A sew-on patch uses a completely different base material from performance sportswear.
Digitizing may therefore need to be adjusted for:
- football kits
- rugby shirts
- polo shirts
- hoodies
- tracksuits
- jackets
- caps
- beanies
- sports bags
- embroidered patches
Stretchy materials usually require careful stabilisation and controlled stitch density.
Thicker fabrics may support heavier stitching, but excessive density can still make the design stiff.
Caps also require special attention because embroidery is often stitched across a curved and structured surface. Stitch direction and design sequencing can affect whether the crest stays centred and balanced.
A digitized logo should therefore be prepared for the actual material on which it will be embroidered.
Why Club Crests Need Special Attention
Sports club crests are often more complicated than standard business logos.
A typical crest may contain a shield, club initials, founding year, banners, stars, animals or decorative lines. All these elements need to remain clear at relatively small embroidery sizes.
The goal is not to reproduce every tiny pixel from the original artwork.
Instead, the design should be translated into stitches while preserving the most important brand elements.
For example, very thin lines may need to be slightly widened. Tiny gaps may need more spacing. Small text may need adjustment so thread does not close the internal spaces.
The final result should still look like the original club badge, but it also needs to work as embroidery.
Colour accuracy also matters. Clubs should provide their preferred thread colours or brand references where possible so kits and merchandise remain visually consistent.
Choosing the Right Stitch Types for Sports Badges
Different parts of a badge require different stitch structures.
Satin Stitch
Satin stitches are commonly used for lettering, borders and narrow shapes.
They create a smooth, polished appearance and work particularly well for club initials and outer edges.
However, satin stitches become less suitable when an area is too wide because long stitches can become loose or snag.
Fill Stitch
Fill stitches are used for larger sections of a crest.
They cover broader areas efficiently and can follow different stitch directions depending on the shape of the design.
The density must be controlled carefully because too many stitches can make the badge stiff and increase production time.
Running Stitch
Running stitches are useful for fine outlines, thin details and small decorative elements.
They use fewer stitches and can help preserve details that would become too heavy if satin or fill stitches were used.
A good digitized design often combines all three stitch types rather than relying on one method throughout the entire badge.
Improving Durability for Match Kits and Sportswear
Sportswear experiences more demanding use than many other embroidered garments.
Football shirts, rugby kits, training tops and jackets may be washed repeatedly throughout a season. They are also exposed to sweat, stretching, friction and regular movement.
The embroidery file needs to support that level of use.
Correct underlay gives the main stitches a stable foundation. Suitable stitch density reduces unnecessary bulk. Proper edge construction helps prevent borders from loosening over time.
A design that contains too many stitches may feel stiff against lightweight fabric, while a design with too few stitches may appear weak or allow the garment colour to show through.
The aim is to achieve the right balance between coverage, flexibility and durability.
For clubs ordering patches separately, border quality is particularly important because the patch edges need to remain strong during sewing, heat application or repeated wear.
Why Testing Before Bulk Production Matters
Even a well-prepared embroidery file should be tested before a large production run.
A sample sew-out shows how the digital design behaves when converted into real stitches.
Clubs and embroidery businesses should check:
- text readability
- badge dimensions
- colour placement
- border alignment
- stitch density
- fabric puckering
- distortion
- thread breaks
- missing details
- overall appearance
If a problem is found, the embroidery file can be adjusted before hundreds of garments are produced.
For example, a border may need slightly more pull compensation, small lettering may need wider spacing, or a large fill area may need lower density.
Making these changes during testing is far easier than correcting an entire batch of embroidered kits later.
What Sports Clubs Should Provide to a Digitizing Service
Better results also depend on the quality of the information supplied at the beginning.
Sports clubs should ideally provide the highest-quality version of their logo available. Vector artwork such as AI, EPS or SVG is useful because shapes and edges remain clear when resized.
It also helps to provide:
- exact embroidery size
- garment type
- intended placement
- thread colour requirements
- preferred embroidery format
- brand guidelines
- photographs of previous embroidery
Common machine file formats include DST, PES, EXP and JEF, although the required format depends on the embroidery machine being used.
If the club wants an existing badge improved, photographs of previous stitch-outs can help identify problems such as uneven borders, unreadable text or excessive density.
Clear information at the start usually reduces revisions and produces a more predictable final result.
Final Thoughts
The quality of a sports club badge depends on more than the embroidery machine, thread and garment.
The digitized embroidery file plays a major role in determining how the design is actually stitched.
Good digitizing controls stitch type, density, underlay, pull compensation, sequencing and thread direction. These details help small lettering remain readable, borders stay aligned and club crests retain their intended shape.
For sports clubs ordering match kits, training clothing, supporter merchandise or custom embroidered patches, investing in better digitizing can reduce production problems and improve consistency across different items.
A well-digitized badge should not simply look good when it is first produced. It should remain clean, recognisable and durable throughout repeated wear and washing.
When the artwork, fabric and stitch file are planned together, the finished embroidery represents the club far more effectively.

