
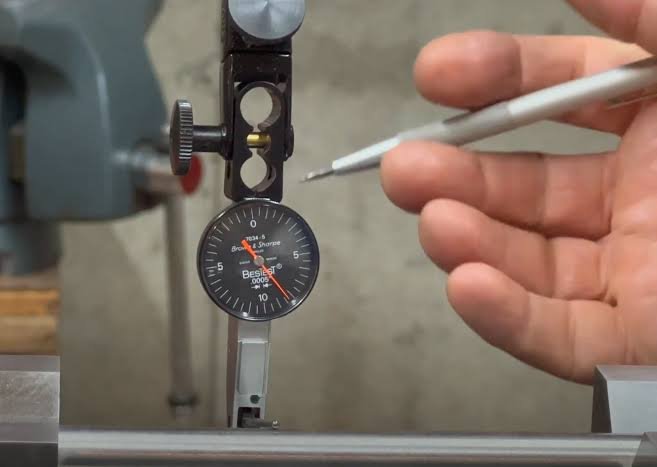
Accurate machine setup is one of the foundations of successful CNC machining. Even small alignment errors can affect part dimensions, surface finish, tool life, and repeatability. Dial test indicators are commonly used to detect these small differences and help machinists verify that vises, fixtures, workpieces, and machine components are positioned correctly before production begins.
Choosing the right dial indicator set depends on the type of CNC work being performed, the level of precision required, the available mounting setup, and the size of the features being checked. A general-purpose indicator may work well for routine setups, while more demanding applications may require finer graduations, greater repeatability, or a compact design that can reach difficult areas.
Dial test indicators are particularly useful because they can show very small changes in position as the contact point moves across a surface. Instead of simply measuring a dimension, the indicator helps the operator compare one position with another. This makes it valuable for aligning vises, checking workpiece runout, centering features, and verifying machine setups.
Machinists should avoid selecting an indicator based only on price or appearance. Resolution, measuring range, contact point design, dial readability, mounting options, and durability can all influence how useful the instrument is in everyday shop conditions.
Better Machine Setup Through Accurate Alignment
One of the most common uses for a dial test indicator is aligning a vise on a CNC milling machine. If the fixed jaw is not parallel with the machine axis, parts may be machined at a slight angle even when the program itself is correct.
To check alignment, an operator can position the indicator against the vise jaw and move the machine table along the appropriate axis. Any movement shown on the dial indicates a difference between one end of the jaw and the other. The vise can then be adjusted until the variation is within the required tolerance.
This process is often referred to as tramming or indicating a vise. The exact acceptable amount of variation depends on the work being performed. A rough machining operation may allow more deviation than a precision job requiring tight dimensional control.
Indicators can also be used to check workpieces before machining begins. Round components held in a chuck or collet can be rotated while the indicator contacts the surface. Changes in the reading can reveal runout and help operators determine whether the part is positioned correctly.
The indicator itself needs to be mounted securely. Magnetic bases, articulating arms, and other holders can position the instrument where the contact point can reach the required surface. A loose or unstable mounting system can create inconsistent readings even when the part or machine is properly aligned.
Contact point positioning is another important factor. The indicator tip should contact the surface at an appropriate angle so movement is transferred consistently to the mechanism. Poor positioning can reduce measurement reliability and make adjustments more difficult.
Operators should also pay attention to the measuring range. Dial test indicators generally have a smaller range than some standard dial indicators because they are designed to detect relatively small deviations. The instrument should have enough travel for the intended setup without being forced beyond its usable range.
Resolution should match the work being performed. An extremely fine indicator may be useful for high-precision setups but may not be necessary for every general machining task. The best choice provides enough sensitivity to identify meaningful alignment differences without making routine setup unnecessarily complicated.
Cleanliness can make a noticeable difference when performing alignment checks. A small chip trapped between a vise and machine table can change the position of the fixture. Chips or debris on the measured surface can also cause the indicator needle to move even when the underlying component is aligned properly.
Before indicating a vise or fixture, machinists should clean the table, mounting surfaces, jaws, and any locating features. Removing burrs and debris creates a more reliable foundation for alignment.
Other inspection tools can complement an indicator during setup. Digital calipers can help operators quickly verify stock dimensions, part widths, lengths, and other general measurements before or during machining. Using different measuring tools for different purposes can create a more complete inspection process.
Machine alignment should also be checked after certain changes. Removing and reinstalling a vise, replacing fixture components, experiencing a machine collision, or performing maintenance may all justify another alignment check before returning to production.
Developing a consistent setup procedure can improve efficiency as well. If operators use the same method each time a fixture is installed, they can reduce uncertainty and make it easier to identify unusual readings.
Which Dial Test Indicator Should I Buy for CNC Machining?
The right dial test indicator should match both the precision requirements of the shop and the environments in which it will be used. For general CNC work, operators should begin by looking at resolution, measuring range, dial size, contact point options, and mounting compatibility.
Dial readability is important during repeated setups. Clear markings and an easily visible pointer can make small changes easier to interpret. A compact dial may fit into restricted spaces more easily, while a larger face may be easier to read from different positions.
Durability should also be considered. Machine shops expose measuring instruments to coolant, chips, oils, vibration, and frequent handling. A precision instrument should still be protected from unnecessary contamination, but sturdy construction can make it better suited to daily shop use.
Repeatability is another valuable characteristic. When an operator checks the same surface multiple times under the same conditions, the indicator should provide consistent results. Unexpected variations may make it difficult to determine whether the machine setup or the measuring instrument is responsible.
Contact point selection can influence usability. Different lengths and tip styles may be useful for reaching narrow spaces, grooves, internal features, or unusual fixture locations. Shops that perform varied work may benefit from having several compatible contact points available.
Mounting equipment should not be overlooked. Even an accurate indicator can be frustrating to use if the holder cannot position it securely. A rigid magnetic base or articulating holder can help operators place the contact point where it is needed while minimizing unwanted movement.
Machinists should also consider how frequently the indicator will be used. A production shop that indicates multiple fixtures every day may place greater emphasis on durability and fast positioning. A smaller shop that uses the instrument occasionally may prioritize versatility for different setups.
An indicator should also be part of a broader measurement strategy. CNC machining may require dimensional checks before, during, and after production. Calipers, micrometers, bore gauges, height gauges, and other machinist measuring tools can provide information that an indicator alone cannot.
For example, an indicator may show that a vise is aligned with the machine axis, while a micrometer may confirm that the finished part diameter meets tolerance. A bore gauge can help inspect internal dimensions, and calipers can provide quick measurements of overall size.
Proper care is important for maintaining indicator performance. The contact point should not be forced beyond its travel range, and the instrument should be stored securely when it is not being used. Dropping an indicator or allowing chips to enter moving components can affect accuracy.
Operators should occasionally confirm that the indicator behaves consistently against a known reference. If readings suddenly become inconsistent or the pointer does not return properly, the instrument may need inspection or calibration.
It is also useful to avoid treating extremely fine resolution as automatically better. A highly sensitive indicator can show tiny variations caused by surface finish, machine vibration, or handling technique. The instrument should be appropriate for the tolerances the shop actually needs to maintain.
In production environments, consistency often matters more than simply owning the most precise tool available. An indicator that is easy to position, easy to read, and dependable from one setup to another can help operators work efficiently while still maintaining the required alignment.
Conclusion
The best dial test indicator for CNC machining is one that provides the resolution, range, repeatability, durability, and mounting flexibility required for the shop’s typical work. General-purpose indicators can support tasks such as vise alignment, fixture setup, and runout checks, while more specialized applications may require finer sensitivity or different contact points.
Accurate alignment can help machinists create more predictable setups before cutting begins. Cleaning locating surfaces, mounting the indicator securely, checking repeatability, and using consistent techniques can all improve the reliability of setup measurements.
A dial test indicator is most effective when used alongside other inspection equipment. By combining indicators with calipers, micrometers, bore gauges, and other precision tools, CNC operators can verify both machine setup and finished dimensions. Building a dependable measurement process can help reduce setup errors, improve repeatability, and support more consistent machining results across every production run.

